
Table of Contents:
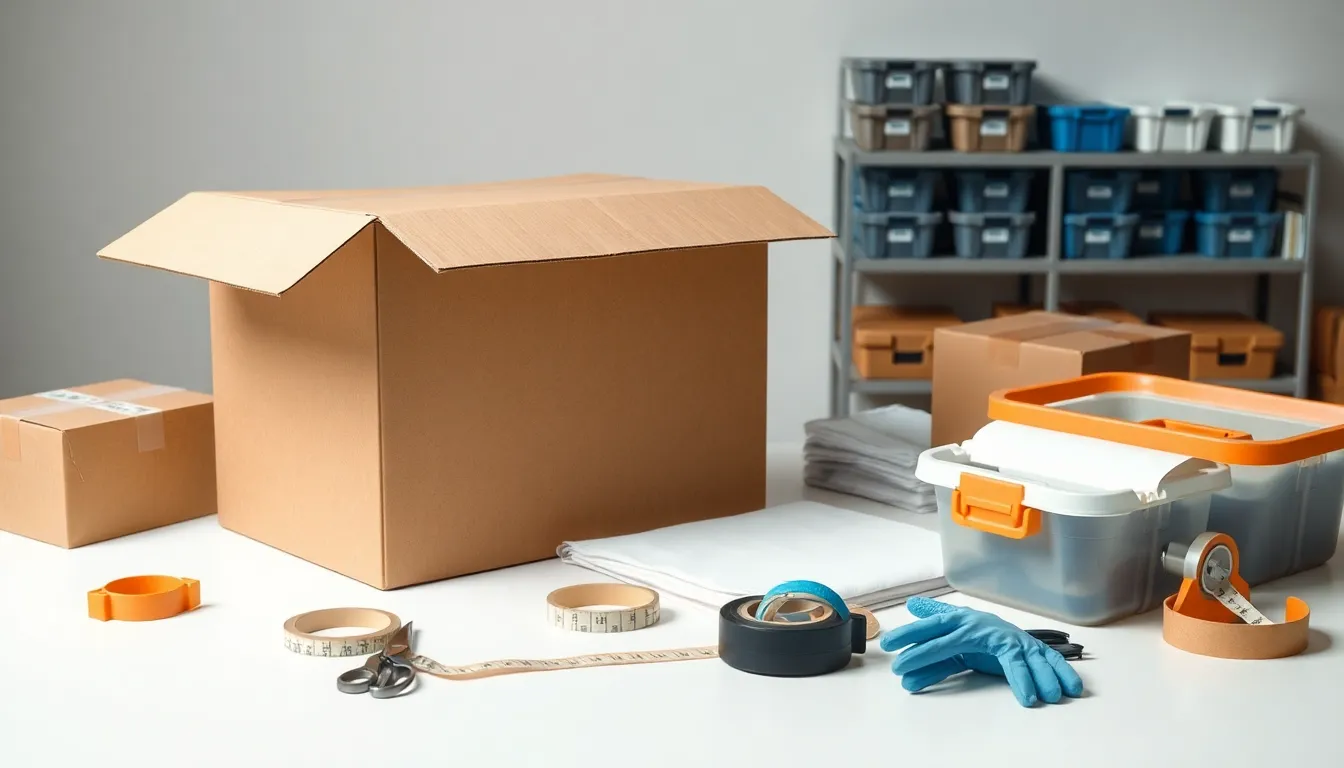
What a Complete Packaging Kit Should Include
A complete packaging kit should cover three jobs: protecting the item, closing the package, and identifying its contents. A box alone is not a kit. If one weak link fails, the whole parcel can arrive damaged, delayed, or difficult to handle.
Use this practical checklist before buying:
- Packaging containers: Choose clean, rigid boxes or mailers with enough room for cushioning. A package should not bulge, bow, or crush when stacked.
- Internal protection: Keep shock-sensitive items away from every wall of the container. Paper padding, molded pulp, foam, air cushions, or corrugated inserts can fill empty space and limit movement.
- Moisture control: Add a sealed inner bag for clothing, books, electronics, or other goods that could suffer from rain or condensation. Do not seal damp items inside.
- Closure materials: Use packing tape made for the package weight and surface. A tape gun helps create a straight seal, while reinforced tape suits heavier cartons.
- Identification supplies: Include labels, a permanent marker, and a contents sheet. Mark fragile goods, orientation, quantity, and any handling limits where they can be seen.
- Measuring tools: A small tape measure and a shipping scale prevent incorrect size or weight declarations. This can avoid surprise charges and rejected parcels.
- Cutting and removal tools: Scissors or a safety cutter speed up packing and unpacking. Store blades safely; a loose cutter inside a kit is asking for trouble.
- Documentation protection: Keep invoices, return details, serial numbers, and insurance records in a waterproof sleeve rather than inside the packed product.
For fragile goods, the most useful feature is not extra filler but movement control. After closing the box, gently tilt it from side to side. If the contents shift, add a fitted insert or more padding. For heavy items, use a smaller carton with a strong base instead of a large box packed to the brim.
Check material compatibility, too. Foam can mark some finishes, adhesive may damage painted surfaces, and printed ink can transfer under moisture. For electronics, antistatic bags are safer than ordinary plastic wrap. For food-contact items, use clean, suitable materials with no strong odor.
A kit is ready when the package passes four quick tests: the item cannot move freely, the seams stay closed, the label remains readable, and the finished parcel can be lifted without strain. That simple check catches many avoidable failures before handoff.
Choosing the Right Box Sizes and Strength
Box size affects more than storage space. It changes the load on the package, the chance of crushing, and the effort needed to carry it. Choose the smallest box that fits the item and its protection without forcing the contents inside.
Use small cartons for dense goods. Books, canned food, tools, and small appliances can become unsafe in a large box. A compact carton keeps the weight manageable and reduces pressure on the bottom panel. As a useful target, keep heavy cartons near 30–40 lb (14–18 kg), especially when they must be carried by hand.
Use medium cartons for mixed household items. They suit cookware, toys, shoes, folded linens, and smaller equipment. Combine lighter objects with heavier ones rather than building a box that is either a featherweight or a back-breaker. Place dense items low and keep the total load balanced.
Reserve large cartons for light, bulky goods. Pillows, bedding, coats, lampshades, and empty containers need volume but little structural load. Large boxes filled with books or ceramics may fail at the base, even when the cardboard looks sturdy. Big does not mean better—usually it means heavier.
Box strength depends on more than the printed dimensions. Check the board grade, flute type, and edge-crush rating when the specification is available. The edge-crush test describes how much force the corrugated board can withstand before its flutes collapse. For stacking, an edge-crush rating is more useful than a vague claim such as “heavy duty.”
- Single-wall board: Suitable for light or moderate loads and short handling routes.
- Double-wall board: Better for dense goods, repeated handling, long storage, or stacked cartons.
- New cartons: The safest choice for maximum strength, especially in humid conditions.
- Used cartons: Fine for light contents when dry, clean, and free from crushed corners, tears, or oil stains.
Plan for stacking before you pack. Keep cartons with similar footprints together, place stronger boxes below lighter ones, and avoid overhang at the edges. A stack should remain stable when the container moves. In a storage unit, leave a narrow inspection path rather than pressing every carton against a damp wall.
Measure the usable inside dimensions, not only the advertised outside size. Corrugated walls, flaps, and protective inserts reduce the available room. Allow roughly 2–3 inches of clearance around fragile objects for cushioning, then test the fit before sealing. If the flaps meet only under pressure, the carton is too small.
For kits sold by room or home size, treat the box count as an estimate, not a promise. Furniture, books, seasonal gear, and personal collections can change the required volume dramatically. A quick inventory by category gives a more reliable result: count dense items separately, estimate bulky textiles by bags or cubic feet, and add a small reserve for last-minute packing.
Essential Packaging Kit Components and Their Uses
| Packaging Component | Primary Purpose | Recommended Use | Safety or Efficiency Benefit |
|---|---|---|---|
| Rigid corrugated boxes | Contain and protect items | Choose the smallest suitable box with enough room for cushioning | Reduces crushing, shifting, and unnecessary package weight |
| Internal cushioning | Absorb impact and limit movement | Use paper padding, foam, air cushions, molded pulp, or inserts around fragile goods | Prevents breakage and reduces vibration damage |
| Moisture-resistant inner bags | Protect contents from rain and condensation | Use for clothing, books, electronics, and other moisture-sensitive items | Helps prevent water damage, stains, and corrosion |
| Carton-sealing tape | Close and reinforce package seams | Apply an H-pattern over the center and edge seams | Keeps cartons closed during lifting, stacking, and transport |
| Tape gun or dispenser | Speed up and improve tape application | Use for repeated packing tasks and straight seals | Reduces wasted tape and awkward handling |
| Labels and permanent marker | Identify contents and destination | Mark room codes, carton numbers, orientation, and handling instructions | Improves sorting efficiency and reduces mishandling |
| Tape measure and shipping scale | Measure package size and weight | Check dimensions and weight before dispatch or storage | Helps avoid incorrect declarations, rejected parcels, and surprise charges |
| Safety cutter or scissors | Cut cardboard, tape, and protective materials | Store blades safely when not in use | Speeds up packing while reducing accidental injuries |
| Specialty cartons and dividers | Support awkward or fragile items | Use kitchen packs for dishes, wardrobe boxes for clothing, and document boxes for files | Improves positioning and reduces wasted space |
| Antistatic bags | Protect exposed electronic components | Use for circuit boards, memory modules, and similar parts | Reduces the risk of electrostatic discharge |
| Waterproof documentation sleeve | Protect invoices, serial numbers, and insurance records | Keep important documents outside the packed product but with the shipment records | Prevents loss or water damage to essential information |
| Hand truck or dolly | Move heavy or multiple cartons | Secure loads before moving and use clear pathways | Reduces lifting strain and improves handling safety |
Specialty Boxes for Kitchens, Closets, and Documents
Specialty boxes solve awkward packing problems that ordinary cartons handle poorly. They keep tall, narrow, delicate, or confidential items in a more suitable position and can reduce wasted space.
Kitchen boxes work best when they include dividers or adjustable cells. Use them for glasses, mugs, bottles, and stemware. Wrap each item separately, place heavier pieces below lighter ones, and keep dividers snug so objects cannot knock together. A dish pack with a reinforced base is useful for plates because it lets you place them vertically instead of stacking a heavy column.
For sharp kitchen tools, use a long, rigid carton or a purpose-made sleeve. Cover blades, secure loose handles, and keep knives separate from soft goods. Never place uncovered cutlery in a box where someone may reach in later.
Wardrobe boxes include a hanging bar, allowing garments to stay on their hangers. Do not overfill the bar. Leave enough room for coats and suits to hang without being crushed, and cover delicate fabrics with a clean garment bag. Shoes should be packed at the bottom only if they are clean and dry; otherwise, use a separate shoe carton.
Small closet boxes suit folded clothing, belts, scarves, and accessories. Group items by use or season, then add a simple inventory card inside. Vacuum bags can save volume for washable textiles, but avoid compressing leather, structured hats, or garments that need air circulation.
Document boxes should protect papers from bending, dust, and accidental mixing. Select a carton that matches letter or legal folders without forcing them into place. Store files upright when possible, and keep the box light enough to lift safely. Use dividers for tax records, contracts, medical papers, and property documents.
- Keep passports, birth certificates, titles, and wills in a separate personal file.
- Make a digital backup of essential records before packing them.
- Use a discreet label instead of naming sensitive contents on the outside.
- Place paper archives above floors and away from exterior walls in storage areas.
Specialty packaging is worth the extra cost when the item is difficult to replace, expensive to repair, or likely to be damaged by poor positioning. A purpose-built carton may seem like a small upgrade, but it often prevents the bigger headache.
Protective Materials for Breakable Items
Protective materials should control three hazards: impact, abrasion, and vibration. Select the material for the object, not simply for the price or appearance. A thick layer of soft filler may cushion a vase, yet fail to stop two glasses from striking each other.
- Honeycomb paper: A plastic-free option for wrapping irregular objects and filling small gaps. Pull the sheet open to activate its cushioning cells.
- Corrugated inserts: Useful for separating plates, framed items, bottles, and other pieces with flat or regular shapes.
- Foam sheets: Reduce scratches on polished wood, ceramics, coated metal, and glass. Place a clean barrier between foam and delicate finishes when chemical contact is uncertain.
- Bubble cushioning: Works well around light, impact-sensitive items. Use the bubbles toward the object, but do not rely on it alone for heavy pieces.
- Molded pulp: A firm, fiber-based choice for bottles, jars, and shaped goods. Its form should match the item closely; loose pulp offers little restraint.
- Edge and corner guards: Protect mirrors, artwork, screens, and furniture edges from concentrated blows.
- Anti-static bags: Recommended for circuit boards, memory modules, and other exposed electronic parts. Ordinary plastic can create electrostatic risk.
Build protection in layers. Start with a soft wrap against scratches, add a firm separator to prevent contact, then place the item in a structure that resists compression. Keep at least one cushioning layer between separate objects. For a fragile item weighing 5 lb, a practical starting point is around 2 inches of resilient cushioning on each vulnerable side, followed by a controlled drop test with an empty outer box. Adjust the design if the item shifts or the material bottoms out.
Do not use loose newspaper around pale fabrics, unsealed ceramics, or surfaces that absorb ink. Damp paper can stain. Reused packing materials should be dry, odor-free, and free from insects, oil, and grit. Shredded paper is useful for void fill, but it settles during handling; compact it in layers rather than pouring in a thin, fluffy bed.
For artwork, protect the face with acid-free tissue or a clean glassine sheet, then add a rigid panel on both sides. Never let adhesive touch the artwork. Wrap mirrors and framed pieces separately, and mark their orientation on the package without placing labels on the finished surface.
Use a simple shake test before sealing: move the package gently in six directions. A faint, cushioned response is acceptable; hard knocks, rattling, or sliding means the internal design needs work. Protection is effective when the object stays centered and the cushioning still has room to compress.
Tape, Dispensers, Labels, and Packing Tools
Tape, dispensers, labels, and small packing tools determine how quickly a kit works in practice. Choose them for the carton surface, the expected load, and the number of packages you need to close.
Use a pressure-sensitive carton-sealing tape with a width of about 48–72 mm. Acrylic tape handles storage and temperature changes well, while hot-melt tape grabs quickly during fast packing. A water-activated reinforced tape can create a strong fiber-reinforced seal on heavy corrugated cartons, but it needs a compatible dispenser and a clean, dry surface.
- Handheld tape gun: Best for repeated sealing. A sharp, covered blade cuts tape cleanly and reduces awkward pulling.
- Water-activated tape dispenser: Useful when tamper evidence and a strong paper-to-board bond matter.
- Low-noise tape: More comfortable in shared rooms, offices, or long packing sessions.
- Painter’s tape: Suitable for temporary notes or removable markings, not for closing shipping seams.
- Stretch film: Keeps drawers, cables, and bundled parts together. It should not replace structural box sealing.
Seal cartons with an “H” pattern: one strip across the center seam and one over each edge seam. For a heavier package, add a second layer, but keep the tape flat. Wrinkles create channels where dust and moisture can enter. Do not use household gift tape; its adhesive and narrow width are rarely made for transport loads.
Labels should answer three questions at a glance: where does it go, what is inside, and how should it be handled? Use large block lettering, strong contrast, and a label position that remains visible when cartons are stacked. Put a duplicate identification slip inside the carton in case the outer label tears away.
- Use room codes such as “KIT,” “BED,” or “OFF” for quick sorting.
- Number cartons in a sequence, such as “BED 3 of 12.”
- Mark the top and one side so the information remains visible.
- Write “open first” only on cartons that contain genuinely useful arrival-day items.
- Cover ink with clear tape when parcels may face rain or condensation.
A permanent marker with a medium or broad tip is easier to read than a fine pen. For reusable systems, colored labels can separate destinations, but never rely on color alone; lighting varies and labels can fade. A compact clipboard, spare batteries for an electronic label maker, and a small roll of blank labels prevent annoying mid-pack interruptions.
Keep blades, tape guns, and replacement rolls in one tool pouch. That small habit saves time and reduces the chance that a cutter disappears under packing paper. Before sealing the final carton, check that no tool, spare key, charger, or essential document has been packed by mistake.
Matching Kit Size to Your Home or Container
Match the kit to the volume of goods, available container space, and handling plan—not just the number of rooms. A small apartment with heavy books may need more sturdy cartons than a larger home filled with light textiles.
Use the 8-foot PODS container as a compact reference for apartments, dorm rooms, or spaces up to about 500 square feet. A 16-foot container suits larger moves, including many three- or four-bedroom homes, with capacity of roughly 1,200 square feet. These figures are planning guides, not guarantees. Furniture, garages, attics, and storage rooms can change the calculation quickly.
For a practical estimate, divide your inventory into three groups: boxed household goods, bulky items, and irregular pieces. Count only the first group when estimating carton needs. Sofas, mattresses, bicycles, and shelving consume container volume but do not translate neatly into box counts.
- Apartment move: A 30-box apartment kit may suit a lightly furnished unit, while a larger 53-box set offers more room for books, kitchen goods, and storage areas.
- One- or two-bedroom home: A 53-box house kit can provide a useful starting point, but compare its contents with your actual inventory before ordering.
- Three-bedroom home: A 76-box kit is a reasonable planning benchmark when the home has ordinary furnishings and limited outbuildings.
- Four or more bedrooms: A larger house kit may be appropriate, especially when the property includes an office, basement, attic, or garage.
Leave working space inside a storage container. Do not pack cartons so tightly that the door cannot close, and keep access to electrical panels, furniture covers, and items needed during the first days. A narrow central route can be more valuable than one extra row of boxes.
Use the container’s internal dimensions when planning placement. Sketch a simple floor plan and assign zones for dense cartons, furniture, and fragile loads. Put items you need first near the door, while long-term storage can go deeper inside. Check the container provider’s current size limits, loading rules, and weight guidance before purchase because specifications and availability can vary by location.
Prices also need a reality check. Examples range from about $99.98 for a 30-box apartment kit to approximately $486.83 for a four-bedroom-plus kit. Treat these figures as listed examples, not fixed national rates. Local stock, delivery charges, seasonal demand, and kit contents may change the final cost.
The best match leaves a modest reserve. Around 10% extra cartons or packing material is often sensible for forgotten drawers, last-minute purchases, and damaged supplies. Buying far beyond the calculated need, however, wastes space and money. Measure first, compare the kit inventory, then choose with a little breathing room.
Moving Kit Examples and Price Comparison
Moving kit prices vary widely because the sets target different loads, rooms, and move sizes. The most useful comparison is not the lowest price, but the cost per practical use: how many cartons you receive, which specialty pieces are included, and whether the kit replaces separate purchases.
- 30 Box Apartment Moving Kit — $99.98: A compact option for a smaller apartment move.
- 53 Box Universal Moving Kit — $199.98: A broader general-purpose set for mixed household packing.
- 76 Box 3 Bedroom House Moving Kit — $399.98: Designed for a larger household with more rooms and contents.
- 4+ Bedroom House Moving Kit — $486.83: The largest listed household option for extensive moves.
- 10 Box Kitchen-Packing and Moving Box Kit — $79.25: A focused choice for kitchen contents.
- 53 Box 1–2 Bedroom House Moving Kit — $320.98: A house-oriented set for a smaller property.
Special-purpose kits provide a different kind of value. A 6 Box Closet Moving Kit at $62.68 focuses on clothing and wardrobe items. A Breakables Packing and Moving Kit at $43.25 addresses fragile goods. Living-room options include a 12 Box kit at $86.43 and a 12-Box kit at $75.59. A 30 Box Storage Kit costs $105.98, while an 11 Box Master Bedroom kit is listed at $90.82.
These prices show why a room kit can be cheaper than buying a large household package when only one area needs packing. Conversely, buying several small kits may cost more than one broad set. Compare the total number of cartons and the included accessories before deciding.
For a quick value check, divide the listed price by the number of boxes:
- 30-box apartment kit: about $3.33 per box.
- 53-box universal kit: about $3.77 per box.
- 76-box three-bedroom kit: about $5.26 per box.
- 30-box storage kit: about $3.53 per box.
This calculation is only a guide. It does not assign a separate value to tape, a dispenser, wardrobe cartons, dividers, or protective supplies. A higher per-box price may still make sense when the set includes items that would otherwise require separate orders.
The listed range covers 18 results, including apartment, house, room, storage, kitchen, closet, and fragile-item categories. Product ratings are generally around 4.1 out of 5 stars, with some products reaching 4.2 or 4.3. Ratings can help identify recurring issues, but inspect recent reviews for comments about missing pieces, crushed cartons, tape quality, and actual box dimensions.
Safety Checks for Lifting, Sealing, and Stacking
Safe packing depends on the final inspection, not only on the materials used. Check each carton for balance, secure closure, and stable placement before anyone lifts it.
Before lifting, test the load. Press the handholds gently, keep the carton close to your body, and lift from a squat rather than from the waist. If the box twists, sags, or feels difficult to control, set it down and divide the contents. Two manageable cartons are safer than one overloaded carton.
- Clear the route of cords, rugs, toys, and wet spots.
- Wear closed shoes with firm soles.
- Use a two-person lift for long, bulky, or unstable loads.
- Keep fingers away from the base and carton seams.
- Use a dolly for repeated trips, but secure the load before moving.
Inspect the seal from end to end. The tape should lie flat, cover the full seam, and remain bonded at both ends. Press down loose corners before handling the carton. If the cardboard is dusty, damp, torn, or soft, transfer the contents to a sound carton instead of adding more tape over a weak surface.
For cartons with hand holes, check that the openings are not torn and that the load does not pull through the sides. Never lift a carton by loose flaps. When using a plastic strap or band, keep it tight enough to hold the carton but not so tight that it cuts into the board.
Stack by stability, not convenience. Place broad, rigid cartons at the base and lighter cartons above them. Keep the stack square, with edges aligned. Do not build higher than the safe limit set by the container, storage facility, or moving equipment. A leaning stack is already a warning sign, even if it has not fallen.
- Do not place heavy cartons on wardrobe or document cartons.
- Keep glass, liquids, and electronics away from crushing pressure.
- Use straps or load bars when cartons may shift during transport.
- Leave clearance around doors, vents, lights, and access panels.
- Recheck the stack after the first movement or vehicle stop.
Watch for temperature and moisture risks. Tape can lose grip in extreme cold, while humid air weakens corrugated board. Avoid storing cartons directly on concrete; use a raised pallet or moisture barrier where appropriate. Never stack packages beneath leaking pipes, sprinklers, or exposed condensation.
Stop immediately if a carton leaks, smells unusual, shows heat, or develops a swollen side. Isolate it and identify the contents before moving anything else. A quick pause is far cheaper than an injury, a spill, or a collapsed stack.
How to Pack Each Room with Less Waste
Room-by-room packing cuts waste because each item gets the right amount of space, protection, and labeling. Start with a sorting pass: keep, donate, recycle, sell, or discard. Packing unwanted items is the fastest way to consume cartons and filler for no good reason.
Kitchen: Use clean towels, napkins, and cloth bags as inner padding where suitable. Nest cookware only after placing a soft layer between surfaces. Save sturdy food containers for small utensils, measuring tools, and loose accessories. Empty jars and tins can hold screws or drawer parts, but label them clearly so they are not mistaken for food.
Living room: Remove batteries, cables, and detachable parts from electronics. Bundle each cable with its device instead of placing all cords in one tangled box. Use blankets or sofa covers as protective layers around furniture, then fill the remaining cavities with soft items already being moved. This turns existing household goods into useful padding without buying extra material.
Bedroom: Pack clothing by season and use. Keep a small arrival-day set outside the main cartons. Place socks, scarves, or folded shirts inside shoes and handbags only when the items are clean and dry. This uses empty space, but avoid forcing fabric into shapes that may crease or deform.
Bathroom: Close every bottle, then place liquids in leak-resistant bags with absorbent material around them. Use small containers for cotton items, hair accessories, and spare toiletries. Keep cleaning chemicals separate from towels, cosmetics, medication, and anything that touches skin.
Office: Remove paper clips, binder clips, and loose staples before packing documents. Reuse file folders as dividers and group papers by action rather than by random drawer. Photograph cable connections before disconnecting equipment, then store the image with the related accessories.
Garage and utility areas: Drain fuel, oil, and other fluids from approved equipment before transport. Never pack hazardous chemicals with household goods. Consolidate small hardware in sealed containers, but do not mix screws from different furniture unless each group has its own label.
- Use boxes already available for suitable items before opening new cartons.
- Cut oversized cardboard into edge protectors or separators.
- Flatten clean, unused cartons promptly so they do not occupy packing space.
- Keep a donation box near the sorting area to prevent unwanted items returning to the move.
- Record reusable materials after unpacking for future storage or returns.
Waste reduction is not the same as using less protection. It means placing the right material in the right location and avoiding empty volume. Measure the result by the number of discarded cartons, unused filler bags, and damaged items—not by how aggressively you can pack.
Product Quality, Reviews, and Material Features
Judge a moving kit by its construction details, not by its box count alone. Board quality, clean cuts, reliable accessories, and accurate contents determine whether the kit performs as promised.
Corrugated cartons may be single-wall or double-wall. Single-wall board suits ordinary household loads, while double-wall board offers more resistance to compression and repeated handling. Recycled content is useful, but it does not automatically mean equal strength. Look for clear material specifications, straight seams, firm corners, and flaps that meet without bending.
Material features worth checking include:
- Corrugated structure: A consistent flute profile supports better stacking and fewer weak spots.
- Recycled or recyclable content: Helpful for reducing material impact, provided the carton still meets the intended load requirement.
- Moisture resistance: Important when cartons may face damp floors, transport condensation, or changing weather.
- Double-wall construction: Useful for dense contents and longer storage periods.
- Clean printing and labeling: Clear markings make handling instructions easier to see.
Review scores can provide an early signal, but the written comments usually contain the useful evidence. Look for repeated remarks about crushed corners, missing tape, inaccurate dimensions, weak handles, or cartons that arrive folded poorly. One isolated complaint may reflect shipping damage; the same complaint across many recent reviews suggests a product issue.
The listed moving-kit range has about 18 results, and most products sit near 4.1 out of 5 stars. Some reach 4.2 or 4.3. Treat these figures as a starting point rather than a laboratory measure. A rating does not show how a carton performs under a particular load, in humid storage, or after several vehicle transfers.
Check the package contents against the description before opening the kit. Count cartons, inspect accessories, and photograph visible damage. If a set includes a tape dispenser, specialty carton, or internal divider, confirm that each part is present before the main packing session begins. Keep unused cartons flat in a dry indoor area, away from concrete floors and direct heat; do not place heavy objects on top of folded cartons.
Finally, compare reviews by use case. A kit praised for apartment moves may not suit long-term storage, while a specialty set rated highly for fragile goods may contain too few general cartons for a full household. The best review is the one that matches your load, handling route, and storage conditions.
Prices, Availability, and Discount Checks
Prices and stock should be checked close to the purchase date. Moving kits can sell out locally, and the same item may show a different price, delivery option, or pickup date depending on the selected store.
- Confirm the current price after choosing your ZIP code or store.
- Check whether the listing is sold as one complete kit or several cartons.
- Review shipping, pickup, delivery, and handling charges before payment.
- Verify the promised arrival date against your packing schedule.
- Read the return policy for opened or incomplete kits.
Do not compare headline prices alone. The real cost includes delivery, replacement supplies, and any items missing from the set. A cheaper kit may become less economical if you still need to buy specialty cartons, extra sealing material, or protective inserts separately.
Promotions also need careful checking. An advertised discount may apply only to selected products, registered customers, or a limited period. Email offers of up to 10% on eligible home accessories may not reduce the price of every moving kit. Check the terms, expiration date, exclusions, and whether the discount applies before or after delivery charges.
Save a screenshot or receipt showing the price, kit contents, and expected availability. This creates a useful record if the product page changes or a pickup order is substituted. If a kit arrives with missing parts, photograph the package before opening it fully and contact the seller promptly. Local availability matters most when your move has a fixed date, so search nearby stores first and compare pickup with delivery.
Finally, allow time for substitutions. If stock is limited, identify acceptable alternatives by box count, material type, and intended use. Keep essential packaging supplies separate from optional extras so a delayed accessory does not stop the entire packing plan.
Conclusion: Choose by Load, Risk, and Space
The right packaging kit is the one that matches the load, risk, and available space of your move. Room count alone is too blunt a measure. A compact home with heavy books has different needs from a larger home filled with clothing and soft goods.
Before buying, make three final decisions:
- Load: Identify dense items that need stronger cartons and careful weight control.
- Risk: Separate fragile, valuable, liquid, electronic, and confidential items from ordinary household goods.
- Space: Compare your inventory with the usable capacity of the moving vehicle, container, or storage area.
Use the listed kit prices as planning references, not permanent guarantees. A $99.98 apartment set may be enough for a small, lightly furnished move, while a $399.98 three-bedroom set serves a very different volume. Local stock, delivery terms, and package contents can change the final value, so confirm those details before purchase.
The final quality check is simple: every item should have a suitable container, every filled package should remain manageable, and the packed load should stay stable during handling. If a kit leaves you with weak cartons, unprotected high-risk items, or unusable leftover material, it was not the right match—even if the headline price looked attractive.
Choose for control rather than excess. A measured kit reduces damage, wasted material, rushed shopping, and unnecessary lifting. That is the real purpose of efficient packaging: getting each item from one place to the next with less risk and fewer surprises.
Packaging Kit FAQ: Essential Tools for Safe and Efficient Packing
What should a complete packaging kit include?
A complete packaging kit should include suitable boxes or mailers, cushioning material, moisture-resistant inner bags, strong packing tape, a tape dispenser, labels, a permanent marker, a tape measure, a shipping scale, and a safety cutter or scissors. Specialty items such as dividers, wardrobe cartons, document boxes, and antistatic bags may be needed for specific contents.
How do I choose the right box size and strength?
Choose the smallest box that fits the item and its protective materials without forcing the contents inside. Use small cartons for dense goods, medium cartons for mixed household items, and large cartons for light, bulky items. Double-wall boxes are preferable for heavy loads, repeated handling, long storage, or stacking.
Which protective materials are best for fragile items?
Use a combination of soft wrapping, firm separation, and void fill to protect fragile goods. Foam sheets, bubble cushioning, honeycomb paper, molded pulp, corrugated inserts, and edge guards can reduce impact, abrasion, and vibration. Secure the contents so they cannot shift or strike the walls of the package.
How can I pack and label boxes more efficiently?
Seal cartons with an H-pattern using suitable carton-sealing tape, and use a tape gun for faster, straighter application. Label the top and at least one side with the destination, contents, handling instructions, and carton number. Keep a duplicate contents list inside each box and organize tools in one accessible pouch.
What safety checks should I perform before moving packed boxes?
Check that each carton is balanced, manageable to lift, securely sealed, and free from tears, dampness, or crushed corners. Keep heavy boxes at the bottom of a stack, use a dolly for repeated lifting, clear the walking route, and leave access to doors, vents, and panels. Avoid lifting unstable or overloaded cartons.